
Tutorial - The Memory Wire Bracelet by Nela Kábelová

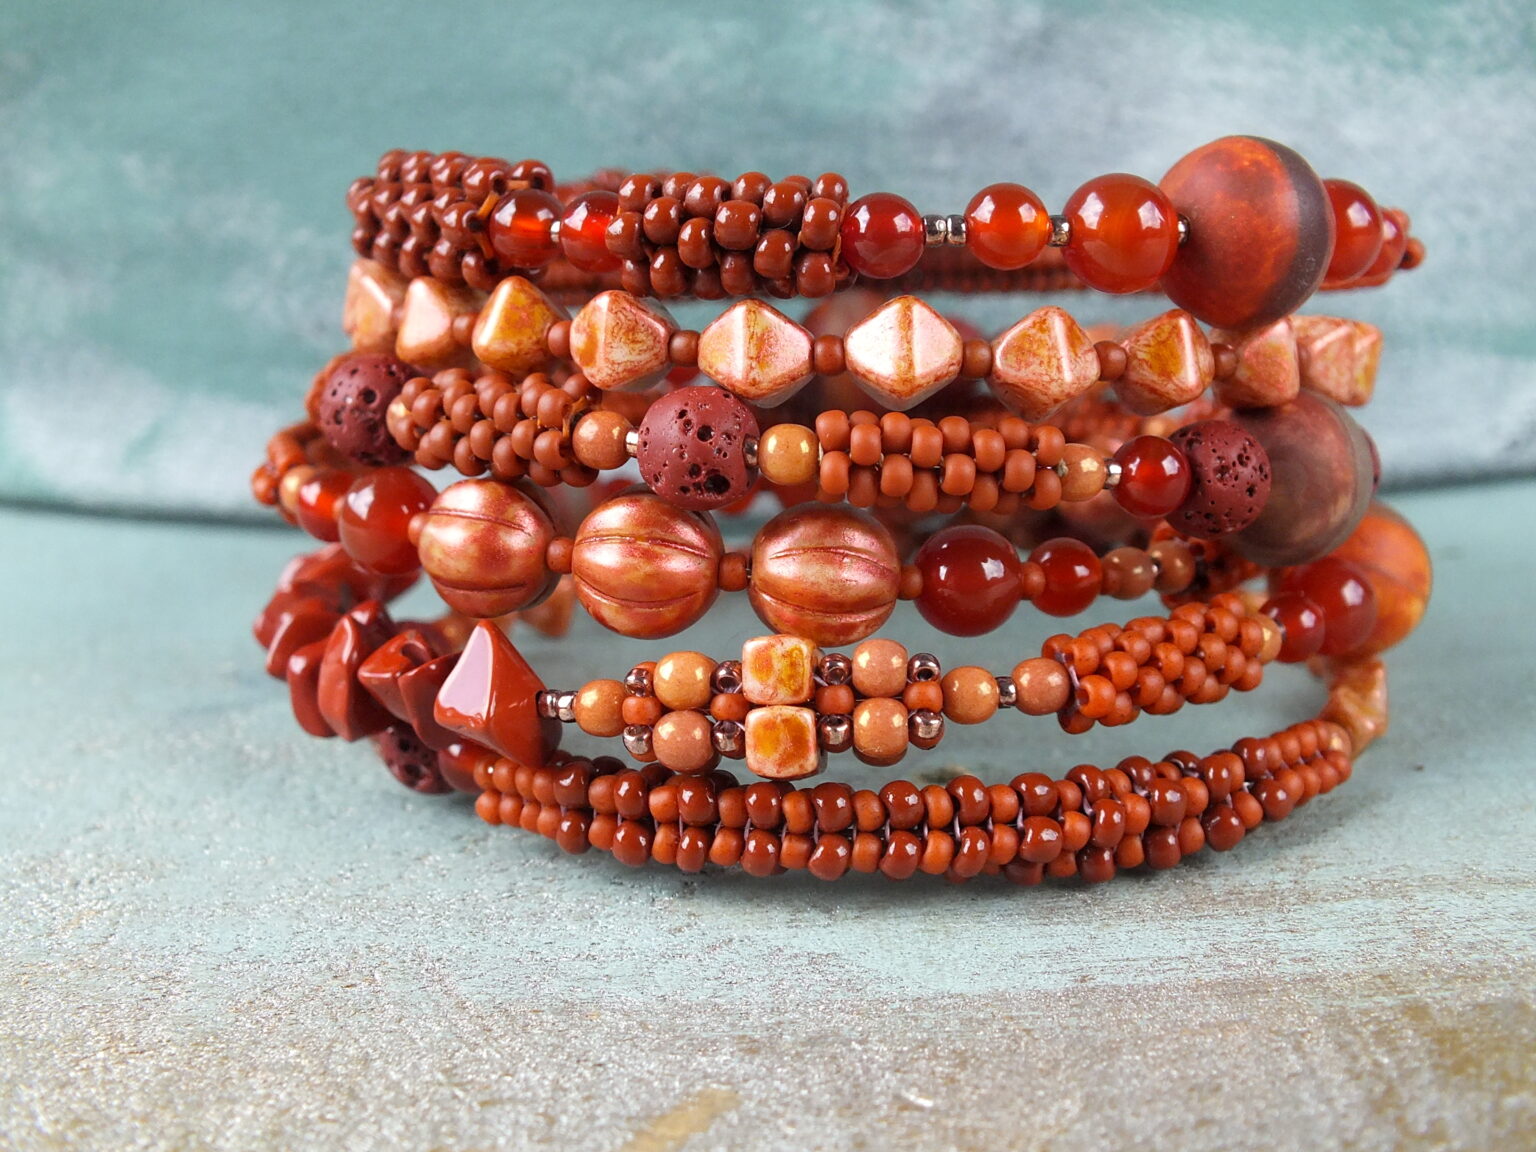
Memory wire is a very popular stringing material – mostly among beginner beaders. But with the right beads and a few beadwoven components, you can turn a piece of wire into a unique and luxurious piece of jewelry.
You can buy an Exclusive mix of beads 'Illusion of Nature' or Exclusive mis of beads 'Stone Inspiration'
from ScaraBeads for making this bracelet
You can buy an Exclusive mix of beads 'Illusion of Nature' or Exclusive mis of beads 'Stone Inspiration'
from ScaraBeads for making this bracelet


This pattern is made by Nela Kábelová. She is a very respected bead master and lecturer of the beading courses for advanced beaders. We are proud to cooperate with her.
You will need:
- Seed Beads, approx. 15-20 grams, depending on the size of the bracelet - click here
– We’ll use these beads to make the beaded ropes and tubes
– You can use any size you have on hand
– If you never did any beadweaving before, choose high-quality seed beads (like Matubo, TOHO or Miyuki) in size 8/0 - click here, click here
– You can use any size you have on hand
– If you never did any beadweaving before, choose high-quality seed beads (like Matubo, TOHO or Miyuki) in size 8/0 - click here, click here
- Memory wire for bracelets, at least 4 – 8 loops, depending on how big you want the bracelet to be.
- Pressed or firepolished glass beads (rounds, rondelles, faceted beads …), 4mm in diameter (approx. 50 – 100 pcs) - click here
- Pressed or firepolished glass beads (rounds, rondelles, faceted beads …), 6mm in diameter (approx. 50 – 100 pcs) - click here
- Pressed or firepolished glass beads (rounds, rondelles, faceted beads …), lampwork beads, gemstones, natural beads, 8 - 10mm in diameter (approx. 10 -20 pcs) (don’t use too much of these, they are going to be too heavy and might cause the bracelet to stretch out) - click here, click here, click here
- Gemstone chips (approx. 20 – 50 pcs)
- Seed beads (no bigger than size 11/0) (approx. 1 gram) - click here

Let´s get beading:
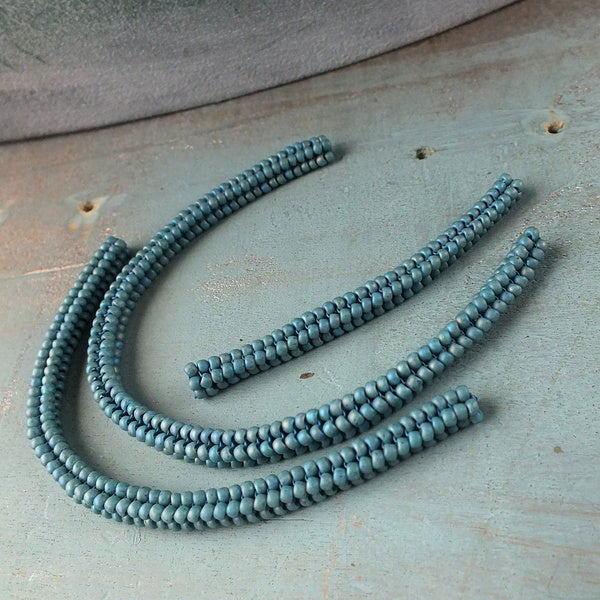 First we’re going to make a few pieces of hollow beaded rope. I usually go for tubular herringbone stitch - it’s quite easy, fast to make and produces a nicely flexible beaded tube, but in our case there is no need to actually finish the rope by adding a clasp - just follow steps 1-28 and skip the rest), but you can go for any tubular stitch you like (for example cubic right angle weave or thin Cellini spiral … or even bead crochet rope).
Our goal is to make 2 – 4 pieces of beaded rope, approximately 5 – 10 cm long.


Then let’s move to beaded beads. I usually make these little peyote-stitched tubes (tutorial here: http://zrzavakocka.cz/4294/zaciname-s-koralky-zaklady-siteho-sperku/) of various sizes, but again, if you have a favorite stitch or pattern that produces tiny beaded beads, stitch up a few of them too.
What I have here are a few peyote tubes and a few little cubes made of 3mm firepolished beads using right angle weave.
What I have here are a few peyote tubes and a few little cubes made of 3mm firepolished beads using right angle weave.
Now we’ll just string it all together.
First, use round-nose pliers to make a loop at the end of the memory wire. You’ll need to put some strength into it, as the wire is fairly hard. If you don’t have the pliers or if you struggle with making the loop, you can just take a small glass bead and glue it to the end of the wire (use glue that is suitable for jewelry, like E6000, and let it set according to the manufacturer’s instructions before stringing).
And now it’s time to get creative. String individual beads (alternating bigger beads with the small seed beads) and beadwoven elements. Use different shapes, sizes, colors and finishes of beads to add some texture to your work, don’t be afraid of asymmetry or unusual color combinations. There are no strict rules to follow – as long as you find the result aesthetically pleasing, you are doing it right.
And now it’s time to get creative. String individual beads (alternating bigger beads with the small seed beads) and beadwoven elements. Use different shapes, sizes, colors and finishes of beads to add some texture to your work, don’t be afraid of asymmetry or unusual color combinations. There are no strict rules to follow – as long as you find the result aesthetically pleasing, you are doing it right.


Keep stringing until you run out of beads … or out of the wire … or both (although you can always add more beads or cut another piece of wire for a second bracelet … ). Leave about 7mm of the wire and use the pliers to make another loop or glue another bead to the end of the wire and let it set.


The bracelet is finished.

Comments
Leave a comment